Understanding the Concept of a Photo Wall
What is a Photo Wall?
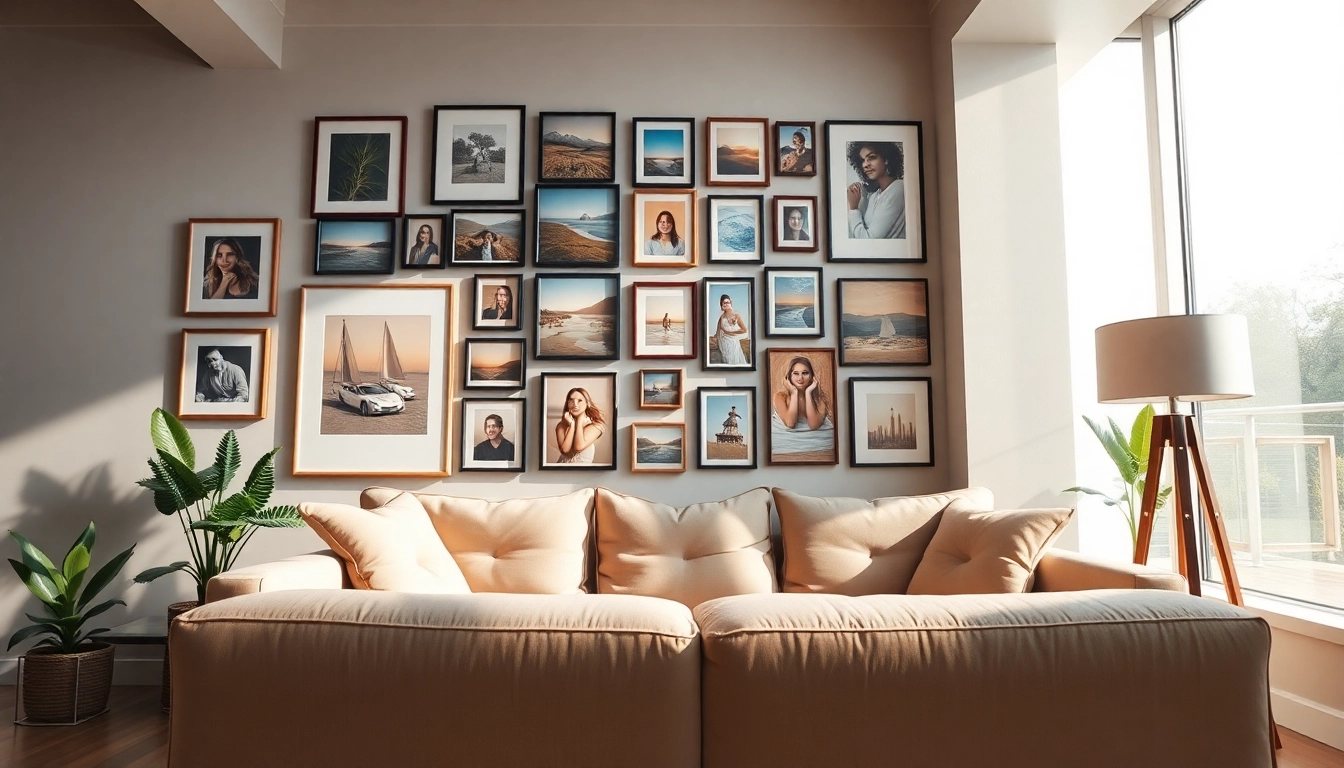
A photo wall is a creative display of photographs arranged on a wall, emphasizing personal memories, artistic expression, or significant milestones. This concept has gained immense popularity as a way for individuals and families to showcase their unique stories visually. Unlike traditional framed photographs, a photo wall allows for a more eclectic and personalized assembly of images, often featuring varying styles, sizes, and colors that contribute to a dynamic visual experience.
Benefits of Having a Photo Wall
Creating a photo wall offers numerous benefits that extend beyond aesthetic appeal. Firstly, it serves as a conversation starter, contributing to the ambiance of your home. Secondly, it can evoke nostalgia, reminding you of cherished moments each time you pass by. A well-curated photo wall can also enhance interior decoration by adding layers of interest and personalization to your space. Furthermore, this unique display allows flexibility in updating and rearranging elements to adapt to changing seasons, family growth, or personal interests.
Choosing Your Photo Wall Style
When considering a photo wall, selecting a style that aligns with your personality and home decor is crucial. Styles can vary from:
- Gallery Style: A curated collection of framed artworks and photographs that create a cohesive gallery experience.
- Rustic Style: Natural materials such as wood and burlap, often incorporating vintage frames for a homely feel.
- Modern Minimalist: Clean lines with a limited color palette focusing on a few select images and frames.
- Bohemian: A carefree approach mixing various frame styles, colors, and sizes accompanied by other decorative elements.
Planning Your Photo Wall Design
Gathering Materials Needed
Before diving into the creation of your photo wall, gathering all necessary materials is essential. These typically include:
- Frames of various sizes and styles
- Mounting tools (hooks, nails, adhesive strips)
- Measuring tape
- Level for alignment
- Screws or anchors for heavier frames
- Artwork or prints to include
- Additional decorative elements (shelves, plants)
Deciding on a Layout
Choosing a layout for your photo wall can significantly impact its overall appearance. Common layouts include:
- Symmetrical Layout: Frames arranged in a balanced, orderly fashion, ideal for a more formal or sophisticated look.
- Asymmetrical Layout: An informal arrangement of varying sizes that creates a dynamic and modern aesthetic.
- Grid Layout: A structured look with each frame aligned in rows and columns, providing a clean and orderly presentation.
Experiment with different arrangements on the floor before making any commitments to hanging. This trial and error will help visualize the final result effectively.
Color Schemes and Themes
Your chosen color scheme and theme can enhance the cohesion of your photo wall. When planning, consider the existing color palette of your room. Popular options include:
- Monochrome: Using black and white photos creates a classic and timeless effect.
- Colorful: Vibrant images framed in contrasting colors can add a playful and lively atmosphere.
- Neutral Tones: Soft, earth-toned frames integrate seamlessly into many decors, promoting calmness and elegance.
Whatever theme you choose, ensure that it resonates with your personal style and complements your home decor.
Creating Your Photo Wall
Step-by-Step Installation Process
Once you’ve gathered materials and decided on a layout, it’s time to execute your design. Follow these steps for a seamless installation:
- Measure and Mark: Use a measuring tape to outline your design on the wall with a pencil, marking where each frame will go.
- Install Hardware: Depending on the weight of your frames, install necessary mounting hardware. Use a level to ensure they’re straight.
- Hang Frames: Start by placing the heaviest frames and gradually fill in with lighter ones to maintain balance.
- Step Back: After arranging everything, take a step back to ensure the overall look aligns with your vision. Adjust as necessary.
Hanging Techniques for Different Wall Types
Different wall surfaces may require unique hanging techniques. Here’s a quick guide:
- Drywall: Use picture hooks or adhesive strips for easy removal.
- Brick or Stone: Install brackets or wall anchors specifically designed for masonry.
- Plaster Walls: Utilize toggle bolts to ensure secure mounting.
- Accent Walls: Make them pop by using colorful mounts that correspond with your wall decor.
Tips for Maintaining Your Photo Wall
Proper maintenance will keep your photo wall looking fresh and inviting. Consider these upkeep tips:
- Regular Dusting: Gently dust frames to prevent buildup of dirt and allergens.
- Promptly Replace Damaged Photos: If a photo becomes scratched or faded, replace it quickly to keep your wall dynamic.
- Seasonal Updates: Refresh your display by swapping out a few photos seasonally to reflect current themes or events.
Enhancing Your Photo Wall with Accessories
Incorporating Shelves and Displays
Adding shelves or three-dimensional displays can add a distinct layer to your photo wall. Consider mixing framed photos with small objects (like succulents or mementos) to create depth and interest. Floating shelves are an excellent option for displaying not only pictures but also your favorite statement pieces.
Utilizing Lighting to Highlight Your Photos
Lighting plays a crucial role in drawing attention to your photo wall. Here are some effective ways to incorporate lighting:
- Spotlights: Professional-looking spotlights can enhance your wall’s features.
- String Lights: Adding a soft glow around the photo wall gives it a whimsical appeal.
- Wall-mounted Fixtures: Use adjustable fixtures to focus light directly on your favorite images.
Seasonal Decorations and Updates
To keep your photo wall fresh and engaging, consider rotating seasonal decorations or updates. For instance, during the holidays, add themed decorations that complement your current photos, such as garlands or ornaments that frame the images. In spring, swap in floral photographs or pastel frames for a light, cheerful touch.
Frequently Asked Questions
How do I choose the right photos for my wall?
Select images that resonate personally—family portraits, travel snapshots, or artistic photos that evoke emotions. Mix varieties to create visual interest.
What are the best frames for a photo wall?
Opt for a combination of styles, sizes, and colors that reflect your personality. Frames should complement the room's decor while allowing your photos to shine.
How much space should I leave between frames?
Typically, leave 2-5 inches between frames. This spacing allows for visual breathing room and helps in creating a balanced look.
Can I create a photo wall on a small budget?
Absolutely! Use low-cost frames or even DIY options. Thrift shops often have interesting finds to help you craft your unique layout without breaking the bank.
How do I update photos on my wall easily?
Use frames that allow quick access, like front-loading or magnetic frames. This makes swapping photos a simple process when fresh memories come along.